Mixing and kneading bread by hand is a deeply satisfying process, but it does require some time and skill. That's why bread machines have become so popular. You load them up, push a button and in a couple of hours, your home will be filled with the wonderful scent of fresh-baked bread. The same holds true if your bread needs to be gluten-free, though the process and ingredients are a bit different. As long as you understand those differences and the reasons behind them, you should still be able to make excellent gluten-free bread in your bread maker.
Tip
You can make gluten-free bread in your bread machine. It helps if your machine has a custom gluten-free cycle, but it's not absolutely necessary.
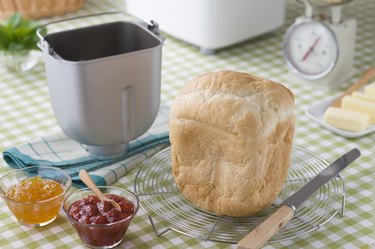 You can successfully make gluten-free bread in a bread machine. Image Credit: MIXA/MIXA/GettyImages
Video of the Day
Frequently Asked Questions
To set the stage, let's look at a few of the most common questions about gluten-free bread. They'll be dealt with in more detail later, but this FAQ makes a useful quick reference.
What is gluten? Gluten is a group of proteins that occur naturally in some grains, such as wheat, rye and barley, but not in others.
What's the difference between celiac disease and a gluten sensitivity? Celiac disease is an immune disorder; when you eat foods containing gluten, your immune system attacks the lining of your intestines. A gluten sensitivity (or wheat allergy) can be unpleasant but doesn't cause physical damage.
Why is gluten so hard to replace in bread? Gluten gives bread its stretchiness, its spring and its pleasant texture. It's like replacing the dairy in cheese – you can do it, but it's a challenge.
How does commercial, gluten-free all-purpose flour work? Packaged all-purpose gluten-free flour uses a mixture of naturally gluten-free grains, starches, gums and other ingredients and is carefully formulated and tested. There are differences among brands, but most will give you an acceptable result when paired with a well-tested recipe.
What Gluten Is and What It Does
You may think of flour as something starchy, and it is, but it also contains varying amounts of protein. Two of the proteins you'll find in wheat flour are glutenin and gliadin, and when they're mixed with water, they combine to form long, elastic strands. Those strands are called gluten, and it's what gives regular bread its distinctive texture. As the yeast in your bread goes about its business, it creates carbon dioxide, and that gas is trapped by the stretchy gluten and forms bubbles (like millions of tiny balloons). Those bubbles expand when the bread is baked and gives your bread its lightness, while the gluten itself provides a satisfying chew.
Unfortunately, in some people, gluten triggers adverse reactions. If you have celiac disease, it causes your immune system to attack the lining of your intestines, which is exactly as uncomfortable (and in the long term, debilitating) as it sounds. Others may have similarly painful sensitivities to gluten or an outright allergy to wheat. Either way, the answer is to stop eating wheat and other grains (rye, barley) that contain forms of gluten. This makes bread making a bit of a challenge, to say the least.
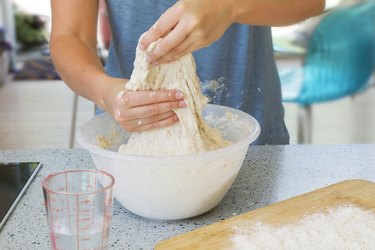 It’s gluten that gives normal bread dough its stretchiness. Image Credit: Peter Cade/DigitalVision/GettyImages
Ingredients in Gluten-Free Breads
Bakers have spent many thousands of years working out how to make great bread by leveraging the gluten in wheat and rye. Replicating those skills (and results) with other ingredients is no small challenge, but it's something at which we're getting better. Ask any celiac sufferer what gluten-free loaves tasted like 20 years ago compared with today's offerings, and you'll get an earful!
There are many thousands of gluten-free bread recipes out there, but whether you're a home baker or a commercial one, the ingredients are much the same. They consist of:
Alternative flours: These provide the bulk of your bread. They can either be true grains (millet, sorghum, rice, corn, oats) that have no gluten or pseudo grains like amaranth, quinoa and buckwheat. Most breads use rice flour as a base and then add others to get the right look and flavor. Brown rice and buckwheat give a darker, whole-grain appearance, for example. Millet, sorghum and oats add sweetness, and buckwheat gives a deeper, darker flavor.
Tip
Oats themselves are gluten-free, but they're often processed in facilities that handle other grains. For gluten-free baking, only buy oats that are certified gluten-free and/or processed in a gluten-free facility.
Starches: Starches soften the texture of your gluten-free bread. Because they turn liquids to gels (picture thickening a gravy or pie filling), they help keep your loaf moist and provide some of the elasticity you'd otherwise get from gluten. Recipes might call for tapioca flour, arrowroot, cornstarch, rice starch or even potato starch. The soluble fiber found in oats (beta-glucans, the same stuff that makes bad oatmeal so gummy) plays a similar role in some recipes.
Non-gluten proteins: Most recipes include one or more ingredients to add protein to your dough. They aren't necessarily exotic; eggs and skim milk powder are two of the most common (unless the bread also needs to be vegan-friendly). These proteins help provide structure just as they do in cakes and other baked goods.
Gums: Starches and proteins can replace some of the stretchy elasticity of gluten, but your bread will be better if you give them a bit of help. That usually comes in the form of gums, which are stronger than starches but work similarly. Adding xanthan gum or guar gum to your recipe helps it trap more of the gas from the yeast, giving you a lighter, higher-rising loaf that looks (and chews) more like regular bread. Psyllium-husk fiber and ground flax seed or chia seed can fulfill this role as well, typically in multigrain-style loaves.
Leavenings: The main leavening in your bread will be yeast, the same as it is in regular breads. That's partly because (spoiler!) it's very good at making bread rise, but also because it's part of bread's flavor profile. Most of the other ingredients are there to work around yeast's quirks, so it will behave as expected. Some recipes may also incorporate a small quantity of baking powder as a handy backup to the yeast.
You can create your own custom baking mix using various flours, starches and gums or start with a commercial all-purpose flour blend that already contains those ingredients. You can make excellent bread either way, so really, it comes down to personal preference (and how obsessive you choose to be).
 Many gluten-free ingredients, like xanthan gum, must be measured accurately in very small quantities. Image Credit: annick vanderschelden photography/Moment/GettyImages
Using All-Purpose Gluten-Free Flour
If you're new to gluten-free bread making, the most reliable path to success is starting with a small recipe – the pan provides relatively more support with a smaller loaf – and a commercial gluten-free flour mix, which already contains the necessary flours, starches and gums in a well-tested combination.
Gluten-Free White Sandwich Bread (Recipe)
Yield: One 1.5-pound loaf
- 1 1/4 cups room-temperature water
- 4 tablespoons butter, melted and cooled (or 1/4 cup oil)
- 3 tablespoons honey, sugar or agave syrup
- 3 eggs
- 1 envelope (2 1/2 teaspoons) quick-rise yeast
- 3 1/4 cups all-purpose gluten-free flour
- 1 1/4 teaspoons salt
- Whisk together the wet ingredients briefly and then add them to the pan of your bread machine.
- Sprinkle the yeast over the wet ingredients.
- Add the flour and sprinkle the salt over the top.
- Select the gluten-free cycle on your bread maker and press the start button (see below if your bread machine lacks a gluten-free cycle).
- Remove the pan from the bread machine when it beeps to signal the end of the cycle. Slide it out of the pan and rest it on a cooling rack. Let it cool to room temperature before slicing the loaf or wrapping it for storage.
Tip
Optionally, brush the loaf with milk or melted butter while it's warm to provide a softer crust. Your bread will be fragile when it's still hot and newly baked, so wait at least 20 to 30 minutes before removing the paddle from the bottom of your loaf.
The quantity of flour may need to be adjusted depending on the brand of gluten-free flour you use. If the bread is dense and doesn't rise as it should, cut back the flour by 1/4 cup. If it's coarse and bubbly in the middle or if it falls while it's cooling, add an extra 1/4 cup.
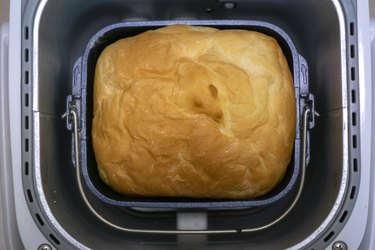 Yes, it will smell as good as it looks. Image Credit: lingqi xie/Moment/GettyImages
Gluten-Free Bread From Scratch
Once you've gained some experience in gluten-free baking, you can begin tinkering with from-scratch recipes and custom blends of flours, starches and gums. Your personality as much as anything will determine when you're satisfied. For most people, that moment will come when you hit on a recipe that makes bread you consider to be good enough. Searching "best gluten-free bread machine recipe" or any similar phrase should lead you to more recipes than you can test in a month.
For some people, a "good enough" loaf just isn't going to be good enough. If you're one of those bakers, comparing recipes that come close to what you want should give you a useful starting point. Use your favorite recipe as a starting point, altering the ingredients and the techniques until you arrive at a loaf that suits your own personal tastes (and, potentially, your dietary restrictions). A few useful tips will make it easier:
- Buy and use a kitchen scale: Really dialing in your recipe requires accurate measurement of your ingredients, and cups just won't cut it. Get a good scale
–
one that will measure in increments of a half-gram or smaller (it really matters with some of your ingredients).
- Be hands-on: Your bread machine will automate most of the process, but you can improve the odds of success by lending a helping hand. Gluten-free breads use lots of ingredients, and whisking them together before you add them to the machine (especially the dry ingredients) helps ensure even distribution and a successful outcome. Also, digging any "orphaned" ingredients out of the corners with a silicone spatula or spoonula will help. (You can often avoid those dry spots by adding the wet ingredients first.)
- Label everything: You're going to end up with a lot of pale, powdery ingredients in bags, jars and containers. Label them to avoid mistakes.
- Only change one thing at a time: When you're fine-tuning a recipe, only make one change at a time so you can assess its impact accurately. If you make multiple changes, you'll never know which one had the desired (or undesired) effect. Also, keep really detailed notes so you don't have to do it all over again.
- Get social: You've heard that phrase about "dwarves standing on the shoulders of giants"? How about "reinventing the wheel"? There are lots of blogs, forums and support groups out there for gluten-free baking in general and bread baking in particular. You can shorten your own quest for perfect bread by exchanging information with others on the same quest and learning from their successes and failures.
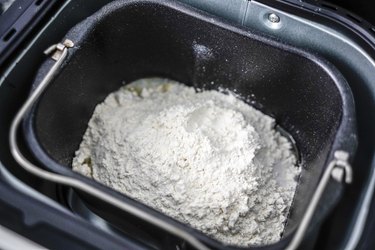 Add the wet ingredients to your machine first and then add the dry. Image Credit: La Bicicleta Vermella/Moment/GettyImages
Handling Gluten-Free Bread Dough
Conventional wheat breads benefit from lots of handling, which makes for longer and stretchier strands of gluten. Bread machine makers plan accordingly – a typical cycle kneads, rests and kneads the dough again before the first rise and then kneads it lightly ("punches it down") once or twice more during the second rise. Finally, it gives it a last few turns of the paddle just before baking to tighten the loaf's shape and make it prettier.
Gluten-free doughs are different because they're wetter – more of a stiff batter than a dough – and require delicate handling after their initial mix lest you lose the air bubbles that make for a light loaf. Bread machines actually make this easier, partly because you don't have to manage a wet and sticky dough with your hands and also because it's mixed right in the pan where it bakes, so you don't lose air by shifting it from a mixer bowl to a bread pan.
The Gluten-Free Bread Machine Cycle
Many current bread machines offer a cycle for making gluten-free bread. It sometimes consists of just an initial mixing and kneading time, a wait for the dough to rise fully and then actually baking the bread. This is essentially the same as the "quick bread" setting, so if your machine doesn't have a gluten-free cycle, you can use that instead. With this type of cycle, your bread may be slightly coarser with large bubbles on the inside.
More sophisticated machines do a scaled-back version of the conventional bread cycle, skipping a full second kneading but still punching down the dough as it rises. It's a balancing act; giving the dough at least a brief punch-down during the rise costs you some of your lift, but by redistributing the air pockets, it creates a bread with a more consistent texture and crumb.
If your machine allows you to program your own customized cycles, you can create your own gluten-free cycle. An initial 10- to 12-minute kneading time and 60-minute rise (or 75 to 80 minutes with a couple of brief punch-downs) will work for most recipes as a starting point. Baking time can range from 40 to 45 minutes for a 1- to 1.5-pound loaf to over an hour for a larger loaf, so you might need to experiment a little. If you keep careful records, over time you can adjust all of those settings one at a time until you arrive at the absolute best cycle for your favorite bread recipe.
Tip
If you have an instant-read thermometer (the kind that's used to check for doneness when you're cooking meats), you can use that to judge when your bread is done instead of guessing. If your bread is fully baked, a thermometer inserted into the middle of the loaf will register 205 to 210 degrees Fahrenheit. If your machine finishes its cycle before the bread is fully baked, you can pop the whole pan out of the bread machine and into your oven to finish. (Be careful – it's hot!)
Getting Started With Gluten-Free Bread
If you don't currently own a bread machine or if you're looking for a new one that has a gluten-free cycle already built in, you'll be spoiled for choice. Most manufacturers now have machines with a gluten-free cycle, so you can choose based on price, features, size, brand loyalty or anything else that's meaningful to you. Without digging into a full-scale bread machine buyer's guide, here are a couple of excellent machines you might consider:
1. Cuisinart CBK-110
If your kitchen is small, this one will appeal to you (and really, who has enough space in the kitchen?). It's tiny at just over 13 inches deep and just over 10 inches wide, so it won't take up much counter space while it's in use or much cupboard space when it's not. Despite its compact size, it will still bake a full-sized loaf of up to 2 pounds. The Cuisinart is a fully featured machine with a gluten-free cycle, a 60-minute keep-warm option after the bread is baked and even an internal light so you can check how your bread is doing without opening the lid. The manual also contains solid information on gluten-free baking, and the accompanying recipe booklet includes gluten-free recipes for bread, pizza dough and a sweet bread.
- Takeaway: A compact, budget-friendly machine that makes excellent gluten-free bread and looks good doing it.
Available on Amazon
Visit Page 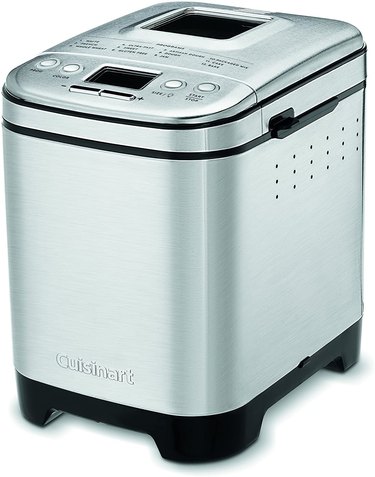 Cuisinart’s sleek, compact CBK-110 offers a gluten-free cycle at a modest price, and it will fit in any kitchen. Image Credit: Cuisinart/Amazon
2. Zojirushi Virtuoso Plus
If you go all-in on your bread baking, this is the machine for you. The Virtuoso Plus makes a standard-shaped rectangular loaf of up to 2 pounds, and its 14 pre-programmed cycles include one for gluten-free breads. More importantly, it has three separate memories you can use to program your own customized cycles for individual gluten-free recipes (because they won't all mix or bake the same way). It also has a heating element in the lid as well as one beneath the pan, so it bakes evenly and reliably and gives excellent control over the color and texture of your crust. It even has a timer, so you can set it up at bedtime and wake up to fresh-baked bread.
- Takeaway: This is the serious baker's bread machine, whether you're baking gluten-free or conventional loaves. Zojirushi's industrial-strength engineering, solid gluten-free preset and programmable custom settings make it well worth the price tag.
Available on Amazon
Visit Page 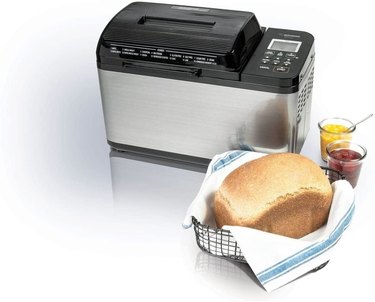 Zojirushi’s Virtuoso Plus is a feature-rich workhorse. Image Credit: Zojirushi/Amazon
Tip
If you'll be baking both regular and gluten-free bread in the same machine, clean it thoroughly inside and out after every batch of bread containing wheat, rye or other ingredients that aren't certified gluten-free. Two common trouble spots are the lid (a loaf that rises too quickly can make contact and leave gluten behind) and the underside and inside of the paddles.
While the internet is a useful resource when you're looking for recipes, there's also a lot to be said for cookbooks. A carefully curated set of recipes created by an expert baker (or a team of experts) can make for a more reliable starting point on your journey. These are two highly regarded examples:
1. The Gluten-Free Bread Machine Cookbook, by Jane Bonacci and Shannon Kinsella
This cookbook has been around for a few years, and it's a well-proven standard for gluten-free bakers. Its 175 recipes include a range of breads, quick breads and desserts, and it even delves into using your machine for things like sauces (because why not now that you have the machine?). The recipes are clean and well laid out, and the book provides both cup measurements and gram measurements for those who prefer to use a scale.
- Takeaway: There are lots of good books (and some great ones!) about gluten-free baking but relatively few that focus tightly on the use of bread machines for gluten-free bread. This is one, and it's a well-proven classic.
Available on Amazon
Visit Page 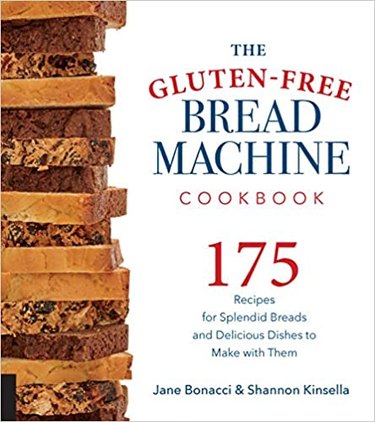 The cookbook goes beyond gluten-free breads to cover many other desserts (and even savory dishes!) that you can make in the machine. Image Credit: Amazon/Harvard Common Press
2. Gluten-Free Baking Classics for the Bread Machine, by Annalise G. Roberts
A lot of celiac sufferers weren't necessarily bakers until they needed to go gluten-free and balked at the price (high) and quality (low) of many store-bought offerings. If that's you, Annalise G. Roberts' Gluten-Free Baking Classics for the Bread Machine is a good starting point. Roberts herself has celiac disease and wrote the book specifically for inexperienced bakers to help them make the transition to preparing high-quality, gluten-free baked goods at home. The fact that it's oriented around the use of your bread machine is a bonus, automating most of the hard work (and minimizing cleanup).
- Takeaway: It takes some expertise to make good gluten-free bread, but that expertise doesn't necessarily have to be yours. The recipes here are carefully curated with novices and unskilled bakers in mind.
Available on Amazon
Visit Page 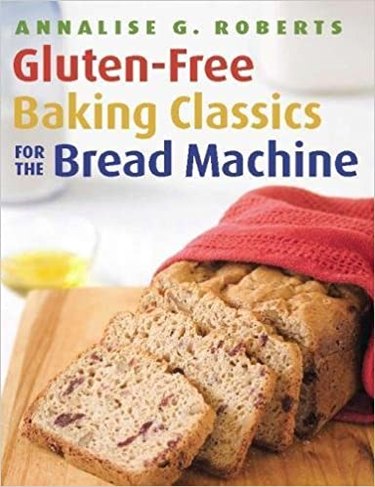 This book focuses on simple, easy-to-make recipes for inexperienced bakers. Image Credit: Amazon/Agate Surrey Publishing

